
Stickers are one of the most popular ways to personalize any surface. Bring your designs to life with this comprehensive Cricut tutorial.
Stickers are a universally loved medium; they come in a vast range of styles, sizes, textures, and appearances. Slap them onto any surface, like a cup or a laptop, and you’ve instantly personalized it. While collecting stickers is a thrilling hobby, there’s nothing more satisfying than seeing something you created come to life in sticker form.
What You Need to Make Stickers
Making custom stickers seems like a daunting task that requires endless supplies, but all you need are four things:
- A digital drawing app (or go hand drawn!)
- Sticker paper
- Inkjet printer
- Cricut machine
Your method of drawing can be as simple as sketching ideas on paper or as digital as drawing on the iPad in Procreate. No matter your method of drawing, the finished composition needs to be digitized in a design software.
Want to get your hands on some stickers right away? Check out the free plant icons that we designed for this tutorial. Simply click on the free download link, open up the icons in a drawing app, and skip to Step 3.
As far as sticker paper goes, look for a product that comes in one single sheet instead of precut shapes. There are different types of sticker paper for different applications: matte, weatherproof matte, semi-gloss, or gloss are your best options for stickers.
Whenever you choose a sticker paper, make sure it’s optimized for your printer type, whether it’s inkjet or laser. Inkjet printers are preferable for making custom stickers, but it all comes down to what the sticker paper is made for.
Lastly, you’ll need a method of cutting out the sticker paper once you’ve printed it. I especially love the capabilities of the Cricut Maker for cutting out detailed shapes in larger quantities. Instead of wrestling with scissors or X-Acto blades, the Cricut does all the hard work for you.
Step 1: Search for Inspiration
Before sketching and drawing your ideas, it’s a good habit to look for inspiration online. Doing this can help you solidify your composition or illustrative style. Some websites I typically frequent include Pinterest, Dribbble, and Behance. Search for broad terms such as “illustration design” or narrow down your search with a specific theme, such as “plant illustration.”

I find that actively looking at other designs and illustrations helps me to step out of my comfort zone and explore other styles in my projects.
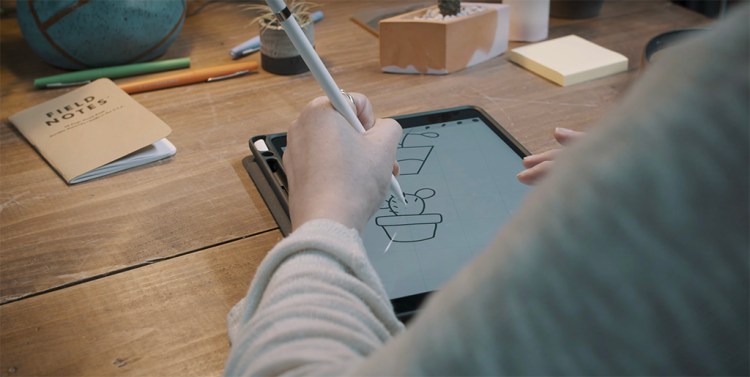
Step 2: Draw out Illustration
Once you’ve gathered some inspiration, it’s now time to put your ideas to the screen (or paper). There’s no one-size-fits-all approach to this step; you can stick to the traditional technique of pen and paper, or go straight to the screen with Procreate, Fresco, Illustrator, or Photoshop.
No matter the method, make sure to organize your illustration onscreen using layers. Separating your artwork into layers allows you to edit your composition or rearrange it as needed.
Step 3: Create White Border
Stickers of all types and styles typically have a white (or dark-colored) border around the design. This border helps frame the illustration while tying all elements of the sticker together. For designs with multiple elements and details, the solid border is especially important, as it prevents those features from separating from one another.

To create a solid border in a digital drawing software, such as Procreate or Adobe Fresco, find a rounded, solid brush. The Monoline brush in Procreate or the Hard Round brush in Fresco works well for this application. Set the hue to white, then create the border on a separate layer that lies beneath your artwork. Your border does not have to be completely accurate, but make sure it frames your illustration well. Fill in any gaps to prepare the sticker for the Cricut machine later on.
If you’re creating your sticker design in Adobe Illustrator, you can quickly make a border with the Offset Path technique. Select all elements of your design and group them together with Command + G. Head to Object > Path > Offset Path, and set the pixel count to your preference.
Step 4: Export Design
In order for the Cricut machine to accurately cut the sticker design, be sure to export the illustration as a PNG. PNG files account for transparency instead of previewing the background as solid white.
Hot Tip: If you’re working with a digital drawing application, make sure your background layer is turned off before exporting as a PNG.

To export your file in Procreate, head to the wrench icon, then select Share as PNG. For Fresco users, head up to the arrowed box icon in the top toolbar, then hit Publish & Export > Export As > PNG. If using an Adobe program, navigate to File > Export > Export As, then select PNG.
Step 5: Upload to Cricut and Refine Image
After exporting your design as a PNG file, go ahead and open up the Cricut Design Space application on the iPad. You can also do this on the Cricut Design Space software on the computer. Create a new project, and hit the Upload button on the main canvas, then head to Upload Image to import your sticker design.

If you’re using the computer version of Design Space, choose from Simple, Moderately Complex, or Complex. For example, my plant illustration is relatively uncomplicated, so I opted for Simple. Then, clean up the illustration using Cricut’s tools and hit Continue.
If you’re working exclusively on the iPad, clean up the illustration using the Erase, Crop, or Remove functions and select Next when finished. Utilize the Smooth and Despeckle tools to further refine your sticker designs.
Step 6: Print Then Cut
Once you’ve refined the illustrations, set a name for your image and select the Print Then Cut option. Save the image, and it will pop up within your recent uploads. Click on the image thumbnail and insert the image onto the canvas. Resize the illustration by clicking and dragging the bottom right corner arrow. Be sure to resize the sticker design to fit within the dimensions of your material. Select the Make It button when finished.

Grab your sticker paper of choice, then load into the inkjet printer sticker facing down. Pair up your printer to the Cricut Design Space software to print out the sticker designs. The printed design will feature a black outlined rectangle in order to allow the Cricut machine to detect those lines and cut precisely outside the illustrations.

Pair up your Cricut machine to the Design Space application by turning on the Bluetooth and staying within 15 feet of the machine. Grab the LightGrip mat, and place the printed sticker paper as close to the upper left corner as possible. Smooth down the sticker paper with your hands or the Scraper tool. Once the Cricut is paired up, load the mat into the machine with the flashing arrow button. The Cricut icon button will then turn on, meaning the machine is ready to cut out the stickers.
Step 7: Peel Stickers and Enjoy!
The Cricut machine will quickly detect the outlined rectangle and then cut the sticker shapes. After a few minutes, the Cricut machine will prompt you to unload the mat when it’s finished.

The best way to remove the sticker paper from the LightGrip mat is to find a corner of the sticker paper and slowly peel it off, making sure not to rip any of the stickers. Use the Spatula tool to remove the remaining stickers from the mat. Your stickers are now ready to use! Peel off the backing and stick your designs anywhere you please.
Interested in the tracks we used to make this video?
- “Homeworks” by Weird Visions
- “Mellow Mallets” by Origami Pigeon
- “Staff Party” by Aulx Studio
- “Mixed Tides” by Origami Pigeon
- “Lo Fi Chillhop” by Sugar Beats
- “Moonlight in Rio” by Sonny Lauderdale
Looking for more crafty tutorials? Check out these articles:
- Beyond Vinyl: What Is the Cricut Maker and What Can It Do?
- DIY Marbling: How to Make Luxe Marble Textures with Household Items
- 21 Professional Designer Tips to Make Your Own Invitations


